menu, press the plus button to add a colour correction. Click on the dabber and use it to highlight the red area of the clip. This creates a colour layer,Then you press the arrow button next to the dabber option. Make sure the inside option is highlighted at the bottom, and the setting is on global. Slide the slider on the left up to the top for a bright red look. Then press outside and click global again and slide that down to the bottom. This takes the colour away from the background, and leaves the area you just highlighted red. I have also learnt that final cut always reads the top line of your timeline. This means anything you edit much be on the top line, or it won't show up when you press play.
Monday, 12 January 2015
Editing: day 2
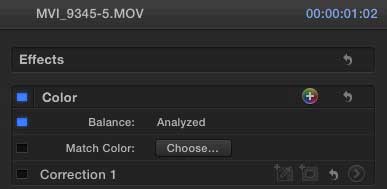
Today we played about with colour. We want the title sequence to be black and white but we still want the red. This is called chromaki. you do this on final cut pro by pausing on the clip where the red is showing. Once you click on the colour
menu, press the plus button to add a colour correction. Click on the dabber and use it to highlight the red area of the clip. This creates a colour layer,Then you press the arrow button next to the dabber option. Make sure the inside option is highlighted at the bottom, and the setting is on global. Slide the slider on the left up to the top for a bright red look. Then press outside and click global again and slide that down to the bottom. This takes the colour away from the background, and leaves the area you just highlighted red. I have also learnt that final cut always reads the top line of your timeline. This means anything you edit much be on the top line, or it won't show up when you press play.
menu, press the plus button to add a colour correction. Click on the dabber and use it to highlight the red area of the clip. This creates a colour layer,Then you press the arrow button next to the dabber option. Make sure the inside option is highlighted at the bottom, and the setting is on global. Slide the slider on the left up to the top for a bright red look. Then press outside and click global again and slide that down to the bottom. This takes the colour away from the background, and leaves the area you just highlighted red. I have also learnt that final cut always reads the top line of your timeline. This means anything you edit much be on the top line, or it won't show up when you press play.
Subscribe to:
Post Comments (Atom)


No comments:
Post a Comment